Showing posts with label Sewing Projects. Show all posts

Thursday, April 28, 2011

Vintage Overnight Case Turned Doll Trunk

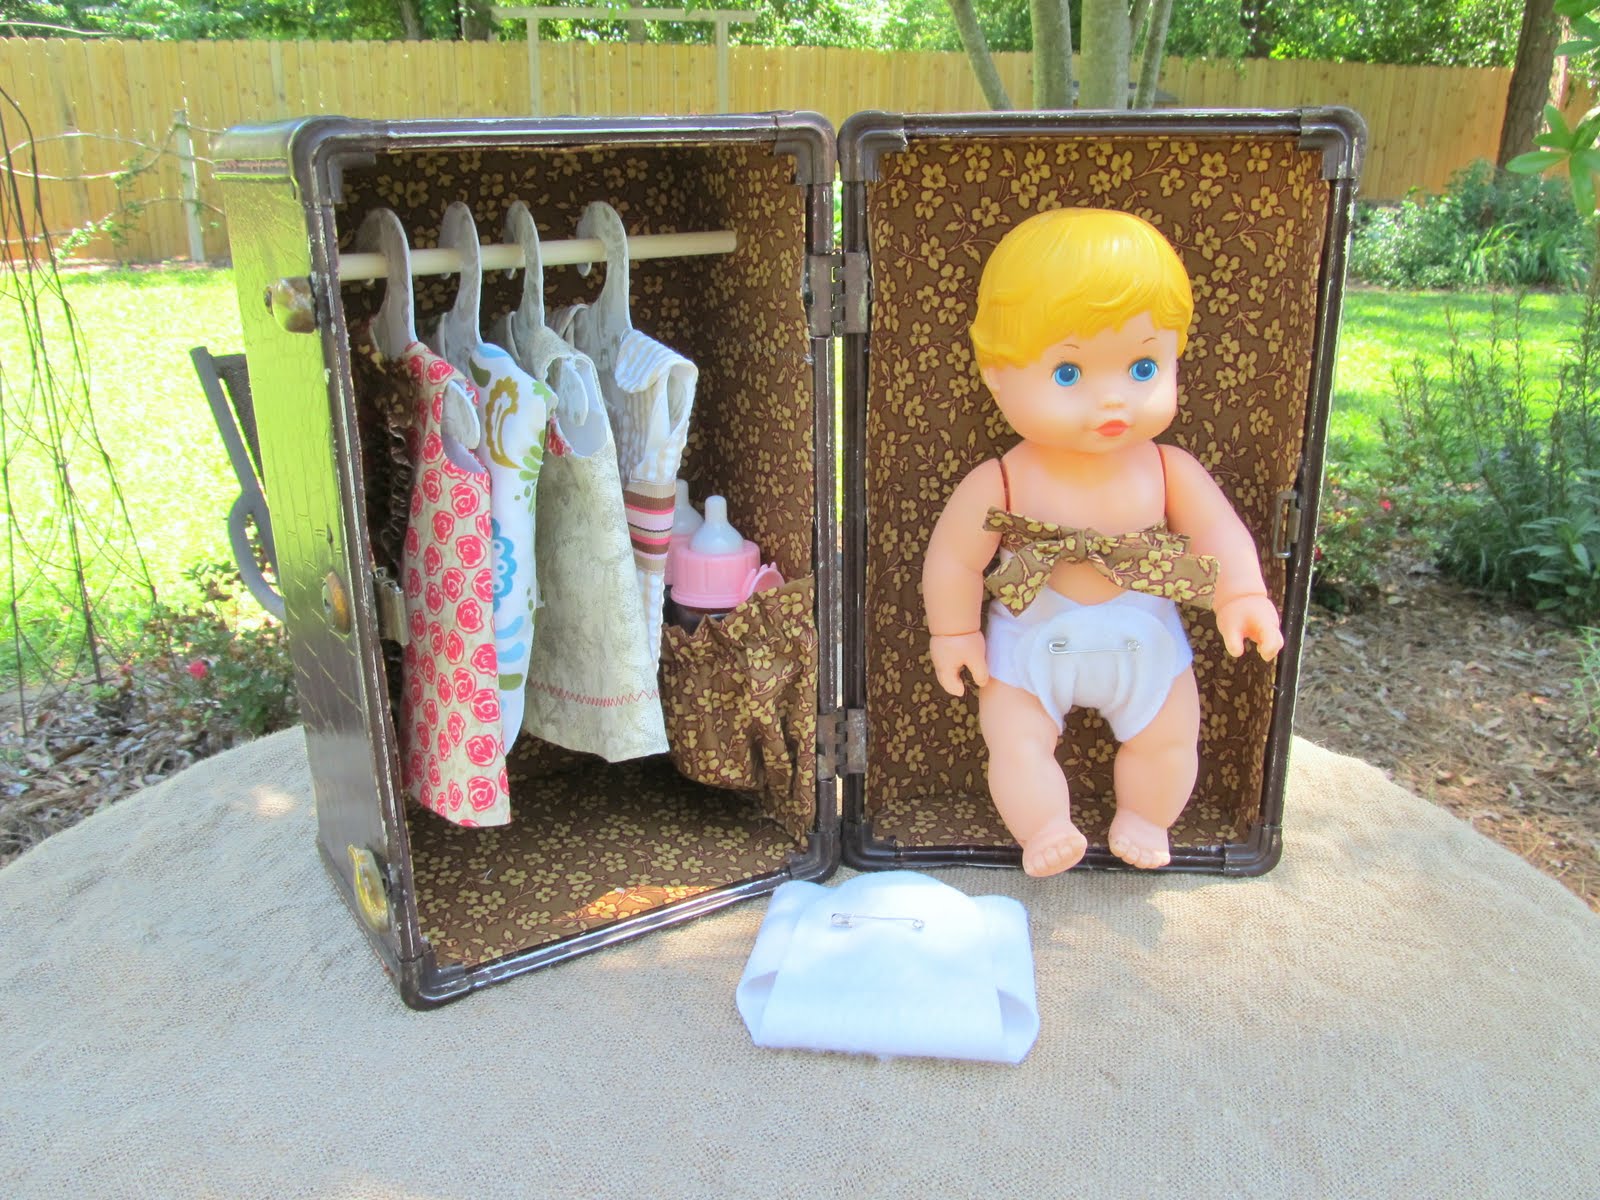
My grandtwins, Aubrey and Chloe, have a birthday coming up.  Because I always make them something, I decided to use the overnight case (the third of my, maybe a little too ambitious, 10 projects in 3 weeks) to make them a trunk for a 1970's doll I found and for the doll clothes I made the poor little naked thing.




I'll have to find second suitcase.  I predict a cat-fight over this one.  I'll be ready with my video camera, though, just in case they stage a Youtube worthy brawl that'll make us all instant millionaires.  

Before they were infamous...


The doll and trunk were the perfect size for each other.  I love it when that happens.  A good bath was all the baby needed but the suitcase was a very different story.  


The outside of the case was in almost perfect condition and just needed a good cleaning and some furniture polish to liven it up.  It turned out awesome...


But, the inside was just plain nasty. I ripped the guts out  and re-lined it with a really cute vintage-y looking fabric.


This was a little tricky.  Not hard, really, just tedious.  Poster board was cut to fit then covered with the fabric using spray adhesive and white glue.  


The fabric was stitched to the poster board to help it stay put.


I added a little pocket for storage, the ties to hold the baby in place and a bar for hanging doll clothes. 


If you enjoyed this post (and, gosh, I hope you did) please BECOME A FOLLOWER!

Monday, April 4, 2011

Re-pillowing (with video tutorial)


This is a good look -- if I may say so.


But, when we have guests over, they sometimes look around, like a deer in the headlights, for a place to sit.

I have to admit, with all those pillows, my sofa looks a little...well...complicated.
 

I decided to go for a cleaner look when I found this yard of fabric for around $5.  Jealous?  


I love the fabric with the rug -- the only real color or pattern in the room.

Using a queen sized down bed pillow I found at the "Maxx" for $14.99 and a scrap of bronze colored silk for trim, this ginormous pillow cost me around 20 smackers....what a deal!


Making the awesome trim is easy even if explaining it isn't.  

I cut 2-1/2" strips of silk 3 times as long as the length of trim I need when finished.  What on earth did I just say?  Let's try that again...

Say I need 1 yard of trim.  I would cut strips of fabric 2-1/2" wide and would need 3 yards of it when stitched end to end.  I hope that's better.


I fold the strip in half and stitch down the center, sewing little tucks in as I go. 


Grab some popcorn and watch the video for details.  
It's my first so I hope you enjoy it!!!


Once you get the hang of it, this goes really fast.  I was able to make enough trim for my pillow in about 10 minutes.  


Now you have the perfect 5/8" pleated trim with a perfect 5/8" flang for stitching.


Here's the new look...


If you enjoyed this post (and, gosh, I hope you did) please BECOME A FOLLOWER!

Saturday, March 26, 2011

Dog Silhouette Pillow

Our oldest daughter is in medical school.  We are very proud of her.  She has worked awfully hard to get where she is, 
weathering hundred hour days, sleepless nights, really gross anatomy and a 6-year-old study partner.  


And even though she has let none of this get the best of her, 
this just might...


Meet Jack.  Fifteen pounds of completely adorable, 
totally out-of-control dog flesh.  


Of course, she's in denial, and thinks it's going to work out.  I, on the other hand, have the job of pessimist -- what are mothers for?  But, I can still hear her, at 12 years old, telling me, "You're responsible for that dog if you bring it in this house!"

We'll see.  I won't mind one bit being proven wrong on this one though.


In the meantime, I've made my grandson (study partner extraordinaire) a pet of the tamer kind for his bed -- a "Jack" dog silhouette pillow similar to those I've seen in decorating magazines.


It was much easier to find a dog silhouette by googling "dog silhouette pictures"  than to get Jack to sit for a picture.  I enlarged the view and used a little cheat I've done before.  I taped my drop cloth fabric 
over my laptop screen and very lightly traced the image with a fine tip marker.  


I'm not recommending this...I'm just telling you how I do it...
it's your laptop... 


I traced and filled everything in with black markers -- how easy was that?  I like the "drawn on" look, myself.


Back at the computer, I typed "Jack" into a document, enlarged it to fit and cheated again by tracing directly from the screen.


This all works best in a dark-ish room.


I drew the border with a marker around the edge.  


There you have it -- 


***


I'll be linking up here:


*Under the Table and Dreaming
*Show and Tell Friday - My Romantic Home
*Frugal Friday - The Shabby Nest
The Friday Flair - Whipper Berry
Remodelaholic Friday - Remodelaholic
Feathered Nest Friday - French Country Cottage
Feature Yourself Friday - Fingerprints on the Fridge
Flaunt It Friday - Chic on a Shoestring Decorating


If you enjoyed this post (and, gosh, I hope you did) please BECOME A FOLLOWER!

Thursday, March 3, 2011

Sheer Slip Cover

I slip covered this metal and vinyl dinette chair in a sheer fabric after spray painting it a bronze color. I wanted the chair to show through.


Normally I would add a tutorial here.  So, it's a first for me when I tell you to forget the how to and skip the tutorial -- DO NOT TRY THIS AT HOME! 


I thought I'd lose my mind making this simple little slip cover.  How hard could it be?  Well?  Very.


The fabric was a slippery mess -- you'd need a nail gun to hold it in place.  


However, the pillow is still one of my favorite projects.  
You can see that tutorial *here*.


I'm done.  It's off to a client's house.  I never want to see it again. 


If you enjoyed this post (and, gosh, I hope you did) please BECOME A FOLLOWER!