Showing posts with label Painting. Show all posts

Saturday, April 16, 2011

Tomatoes 101

 I grew up in the south where my next door neighbor was an elderly lady named Mrs. Ardis.  She could grow just about anything and spent her days in her garden where I was always welcome.  I realize now I learned about sustainable gardening from her although it was not called that back then.

8x6 Oil on Masonite
I painted one of my seedlings a couple of years ago...
I must really like tomatoes!


Mrs. Ardis rooted roses, azaleas, and hydrangeas by the dozens.  She planted her cuttings in old coffee cans.  Each was covered with a bread bag making a mini hot house.  She grew her vegetables using seeds she saved from one year to the next.  Once, she pinned a leaf to her kitchen curtain that sprouted tiny little plants all along the edge.

I was fascinated.

I was remembering her and her Dixie Cups filled with tiny tomato plants yesterday when I was working in my vegetable garden.  I have wonderful memories of my sweet little Mrs. Ardis.

*** 

My first round of tomatoes were planted 5 weeks ago when they looked like this...


Now they look like this...


Planting Tomatoes

  • Plant a few hills early in the spring.  If we get a frost,  I just cover them up.  I just planted 3 more hills and will add another 3, a month from now.  I stagger my planting this way so that when one planting begins to play out, another one is just getting started -- I don't get all my tomatoes at once.  
 
  • I purchase plants (shame on me) from the garden center.  I like Celebrity and Sweet 100's and I look for plants that are not too leggy, stand upright, have no wilted leaves and no blooms.  

  • Grow two plants for each member of the family who will eat lots of tomatoes, as a rule of thumb. If you plan on canning tomatoes or making fresh and canned salsa, use up to four plants per person.

  • Plant in  a sunny spot.  Place tomato plants in a site that gets full sun (7 hours or more daily). Tomatoes need lots of warm sunshine.

  • Prepare the garden bed by adding lots of well rotted compost if you have it. 

  • Remove the leaves from the bottom half of the plant and plant deep in the hole burying 50-75% of the plant.  This is hard for me to do when I buy such a nice, tall plant but it's a must!  It makes for a stronger plant.

  • Give each plant about 1 gallon of warm water within ten minutes of transplanting to avoid transplant shock.

  •  Space tomato plants 18 to 36 inches apart.  Don't forget to leave yourself enough space to get in between the plants to water, weed, and harvest. Those cute, little seedlings may not remain that way for long. 

  • Use a tomato cage or a tall stake to support the tomato vine about 14 days after transplanting

  • Choose whether to use chemical fertilizers. I am lucky to have chickens and all the chicken poo I want.  I use soiled hay from my coop as a mulch for each plant being careful not to let the mulch actually touch the plant.  This is the only fertilizer I use because I have a chicken tractor that's been on all of my planting beds so the chickens have already fertilized each bed.  If you choose chemical fertilizers make sure they are made for vegetables and not grass and follow the manufacturers instructions!

  • Shake your plant poles or cages gently once or twice each week for about 5 seconds once flowering starts to promote pollination of the blossoms (from one flower to another).


  I'll have to post about chicken tractors soon but here is a look at mine in last year's garden...

Click on the picture if you'd like a little backyard tour with some pretty shocking "before" pictures!


Ha! Notice the tomatoes gone wild!

***

I'll be hooking with these fun ladies...


May 27 - Favorite appetizer recipe
A Little Knick Knack 


Fireflies & Jellybeans
Tales from Bloggeritaville
Brambleberry Cottage
My Repurposed Life
French Cupboard
Beyond the Picket Fence

If you enjoyed this post (and, gosh, I hope you did) please BECOME A FOLLOWER!

Wednesday, April 13, 2011

Thrift Store Table meets.....its match!

I paid only $15 for this little kitchen farm table so I don't mind so much putting it outside on my shabby carport turned breezy patio and hoping for the best.  The patio is covered but the ceiling is so high it still gets wet sometimes.  I think it will survive.  But if it doesn't,
I can still sleep at night. 


It needed a little livening up.  So, I broke out the (New Avocado by Valspar) spray paint and gave it the update it needed to be able to keep up with the blue chairs I snagged for $5 each at GW. 


What came next was a hard sell...

I may have added that last part myself.

*

 These are my tools of choice--


And this is the "damage" they can do--


A little stain...


And I love, love, love this color!


He'll understand when he's older.


***
I'm linking up with Donna @ Funky Junk Interiors


If you enjoyed this post (and, gosh, I hope you did) please BECOME A FOLLOWER!

Tuesday, March 22, 2011

Bird Lamp Tutorial

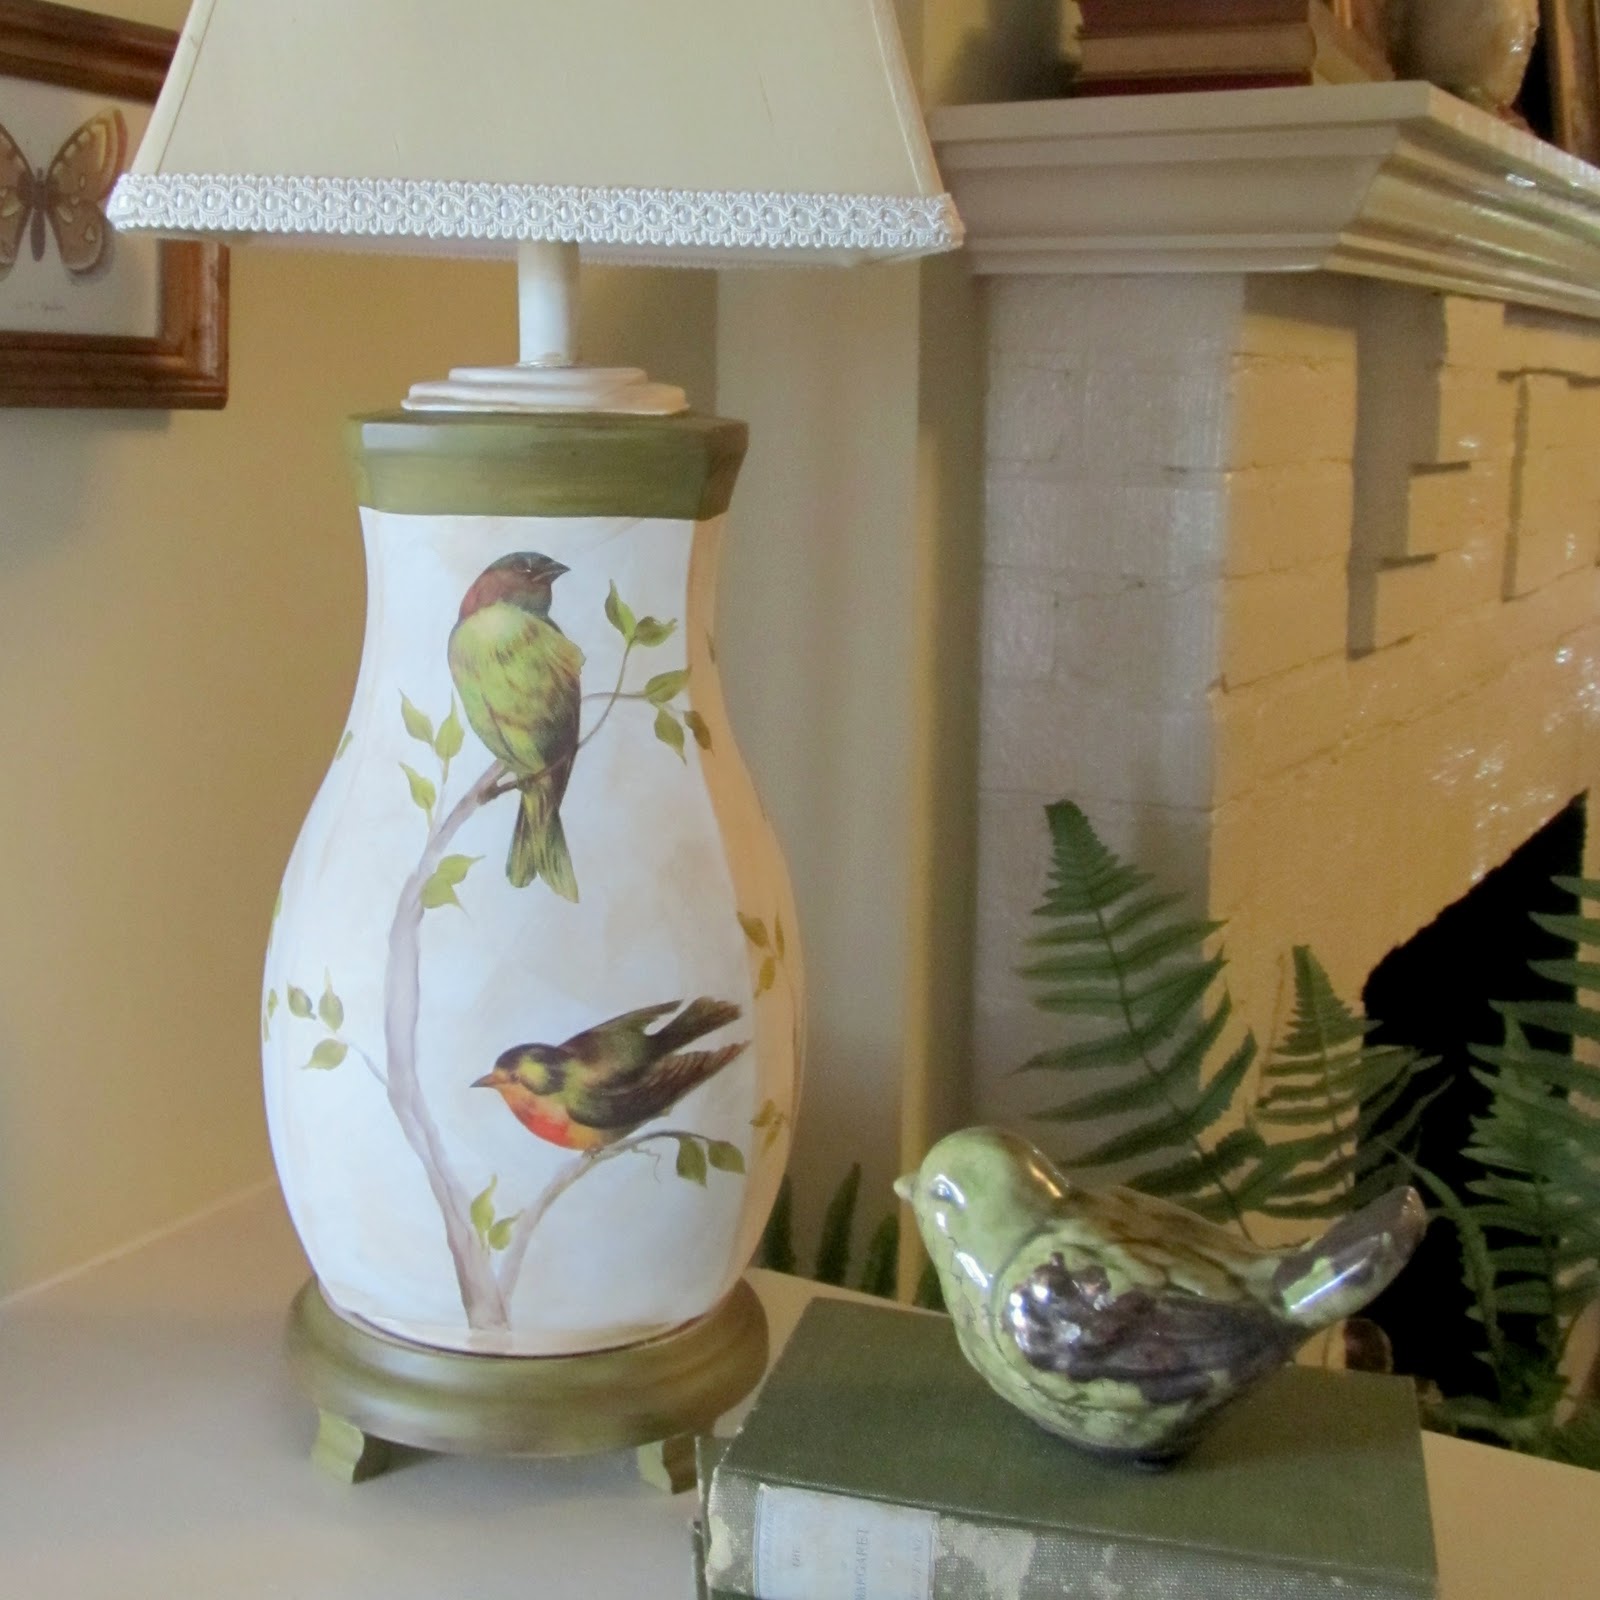
It's another bird post.  I'm at risk of an intervention, I know, but I have to show you how I (re)made this lamp.


I've done a couple of projects using this same process.

This one...
Click on the picture to see the details
And this one...

Click on the picture to see the details


It's fast.  And pretty easy.  

I'll show you again if you missed the other tutorials...


Color, circa 1987?  Shade, a little too shabby to be Chic?


After a good sanding and a nice coat of creamy white spray paint it was looking pretty good.


I found these gorgeous birds at The Graphics Fairy,  printed them out on card stock and carefully cut them out.  I like using card stock for decoupage projects.  It's easy to control.   It doesn't wrinkle up when you hit it with a little Mod Podge and there's no curling up and rolling away.


I played around with the placement of the birds.  I wish I could remember to do this before I paint on the limbs but, well,  that would be someone else's blog, now wouldn't it?


I have a nice assortment of Plaid paints I used for the limbs and leaves.  I get good coverage and I love the millions of colors.


I used Mod Podge (which I called Hodge Podge for years....sorry Plaid) to attach the pretty birds.  I brushed a good heavy coat on the back, pressed it onto the lamp, then brushed some on the front of the paper as well.


I washed the entire lamp with watered down brown paint for an aged look.  A good coat of clear spray paint, a little lamp shade love and there you have it -- another bird project because you just can't have too many of 'em.


 If you enjoyed this post (and, gosh, I hope you did) please BECOME A FOLLOWER!

Wednesday, February 9, 2011

Fairy Nursery Wall Clock


Fairy dust abounds in the nursery where this clock resides...


Made from scrap lumber, bead board, a dollar store picture frame and a vintage thrift store clock this nursery wall clock is 36" tall from crown to toes. 


The door to the small cabinet "body" was made out of the picture frame and opens to accommodate baby's keepsakes.  The arms, legs and head were cut from a scrap of 1x10 pine and attached to the body with eye bolts so they dangle.  The cabinet back and whimsical wings were cut from a single piece of bead board left over from another project.  


 I cut all the parts with a jigsaw.


 Then assembled the tiny cabinet.


Meet Dewalt Brad Nailer -- the best $300 we ever spent!


 I added textured paintable wallpaper around the outside.


This was my last "during" picture.  I had to stop taking pictures and get to work so there would be "after" pictures. 


It's decorated in a quirky, vintage-y style with brightly colored scrapbook paper and paint, old book pages and a sweet reminder to
... "always kiss me goodnight". 


I'm linking this post up with Donna @ Funky Junk Interiors


If you enjoyed this post (and, gosh, I hope you did) please BECOME A FOLLOWER!