Showing posts with label French Style. Show all posts

Friday, May 13, 2011

Vintage Style Hanging Light


I'm trudging along...working on my list of 10 projects.
This one is #8.  Feels like #800, but no, it's just #8. I'm counting.

 I plan to hang this baby in my TV room where it's needed for reading.  My floor lamp just bit the dust.  It started turning itself on.  Clearly that was not a good sign.  

So, this skeleton of a light (I had no idea what to do with it when I bought it) is now the perfect replacement.  It still needs to be rewired but for that,
I'll need a professional. 
I was inspired by the hanging light in this room, my favorite picture ever -- except for maybe my kids.


Now I have one of my very own.
***

I started with this pitiful excuse of a hanging light fixture.  I got it for a couple of dollars because it was missing a glass globe and was in need of rewiring.


I was busy looking for a replacement globe when I decided to try a cloth shade I already owned. 
I loved the look but it was stained...


Solution.  Strip it naked and give it a new outfit.  One that's a little more fun.


I used pre-washed burlap and the old shade cover for a pattern.  I hemmed the top and bottom and stitched jute along the edges to tie it on.  


The plate that held the original glass in place was oversized and perfect for keeping the wire shade snug and straight.  It will also help soften the light coming from the bottom of the shade -- great for a reading lamp!


I'm in love....


...with an inanimate object.  Again.

***

BTW, I'll be partying here...


If you enjoyed this post (and, gosh, I hope you did) please BECOME A FOLLOWER!

Wednesday, April 13, 2011

Thrift Store Table meets.....its match!

I paid only $15 for this little kitchen farm table so I don't mind so much putting it outside on my shabby carport turned breezy patio and hoping for the best.  The patio is covered but the ceiling is so high it still gets wet sometimes.  I think it will survive.  But if it doesn't,
I can still sleep at night. 


It needed a little livening up.  So, I broke out the (New Avocado by Valspar) spray paint and gave it the update it needed to be able to keep up with the blue chairs I snagged for $5 each at GW. 


What came next was a hard sell...

I may have added that last part myself.

*

 These are my tools of choice--


And this is the "damage" they can do--


A little stain...


And I love, love, love this color!


He'll understand when he's older.


***
I'm linking up with Donna @ Funky Junk Interiors


If you enjoyed this post (and, gosh, I hope you did) please BECOME A FOLLOWER!

Tuesday, March 22, 2011

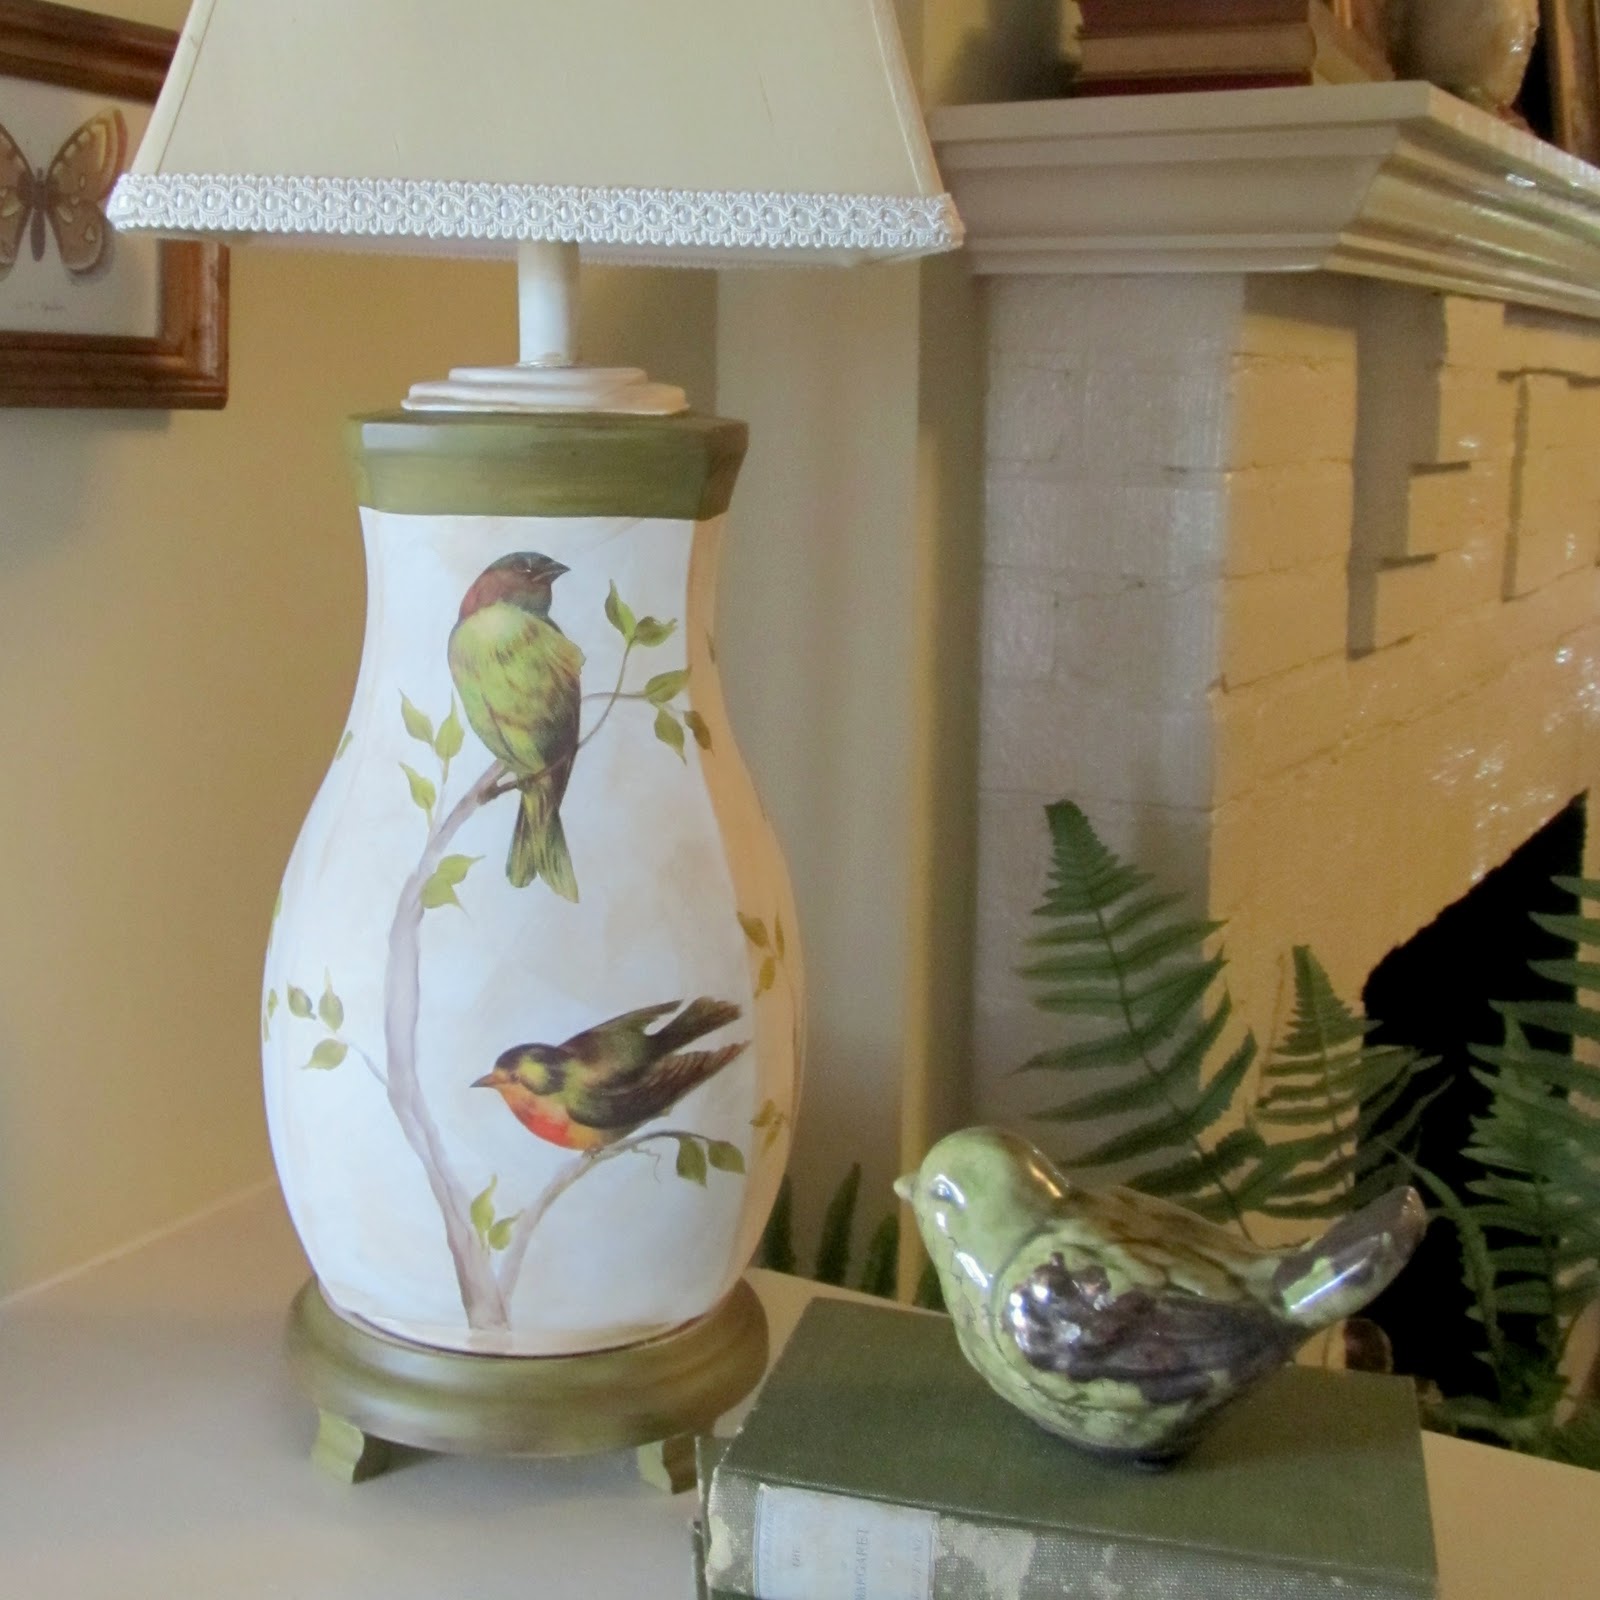
Bird Lamp Tutorial

It's another bird post.  I'm at risk of an intervention, I know, but I have to show you how I (re)made this lamp.


I've done a couple of projects using this same process.

This one...
Click on the picture to see the details
And this one...

Click on the picture to see the details


It's fast.  And pretty easy.  

I'll show you again if you missed the other tutorials...


Color, circa 1987?  Shade, a little too shabby to be Chic?


After a good sanding and a nice coat of creamy white spray paint it was looking pretty good.


I found these gorgeous birds at The Graphics Fairy,  printed them out on card stock and carefully cut them out.  I like using card stock for decoupage projects.  It's easy to control.   It doesn't wrinkle up when you hit it with a little Mod Podge and there's no curling up and rolling away.


I played around with the placement of the birds.  I wish I could remember to do this before I paint on the limbs but, well,  that would be someone else's blog, now wouldn't it?


I have a nice assortment of Plaid paints I used for the limbs and leaves.  I get good coverage and I love the millions of colors.


I used Mod Podge (which I called Hodge Podge for years....sorry Plaid) to attach the pretty birds.  I brushed a good heavy coat on the back, pressed it onto the lamp, then brushed some on the front of the paper as well.


I washed the entire lamp with watered down brown paint for an aged look.  A good coat of clear spray paint, a little lamp shade love and there you have it -- another bird project because you just can't have too many of 'em.


 If you enjoyed this post (and, gosh, I hope you did) please BECOME A FOLLOWER!

Thursday, February 24, 2011

DIY French Style Jug


Things like this never, ever happen to me.  But, just this once...
I got lucky.  


And, it was a perfect fit, a match made in heaven, a pretend vintage french jug in the making.


All I had to do was water down some dark brown acrylic paint, coat the basket to give it some age... 


...and clean up the jug a little.


That's it.


How lucky was that?


If you enjoyed this post (and, gosh, I hope you did) please BECOME A FOLLOWER!