Showing posts with label Upcycling. Show all posts

Thursday, June 2, 2011

Rustic Trunk from Salvaged Wood


I'll spare you the picture of me butt-up and knee-deep in our local landfill but I will promise you if you ever get a chance to dig around in one -- you'll be hooked!


I was when I found this pile of heart pine wood on my very first trip.  Crystal ball...I see a second trip in my very near future.  

The 1x6's were clean and pretty clear of nails.  I'm saving them for my next "big" project -- a powder room addition.  They'll make a beautiful, free ceiling treatment for the tiny room.  

The 1x12's were nasty and riddled with holes.  They looked like they had been involved in a shoot-out with a nail gun in which they'd barely survived.  


We call that "character" in these parts...


I needed a(nother) storage spot for fabric in the guestroom where I sew so I just ignored all the negatives and carried on -- just like the sign says.


The construction was very basic.  I added a stencil, applied randomly using stain, to add a little "something, something" to the basic box look.


I have to tell you about the quilt I plan to leave folded on the trunk.  It's vintage, was a $10 find, and it has only one loose seam. 


Oh, and it's amazing!!!

***
I'll be linking up here...


If you enjoyed this post (and, gosh, I hope you did) please BECOME A FOLLOWER!

Wednesday, May 18, 2011

Super Simple Garden Bench

This super simple garden bench was made from lumber 
I pulled from my scrap pile. 


 The 4X4's were pressure treated.  The seat was a true 1X10x43 piece of cypress.  My only purchase was the two inexpensive plant hangers -- turned upside down.


You can do this...


You'll need two 32" long 4x4's.  Using post hole diggers dig holes about 16" deep and 24" apart.  Thank goodness I don't do this for a living -- I'd starve slam to death.  In fact, this might be a good time to appear helpless in order to attract some help.

Insert and test the posts to adjust the depth until the posts are the same height.  You want have 16 inches above ground and 16 inches below ground.  I used a level and laid it across the two posts to get them level.

 BTW, If you haven't been rescued by now, forget it, you're home free. 

Now, straighten the posts and pack the dirt back in around them.  You can use the handle of your shovel to pound the dirt in around the posts as you go.

Center the seat on top of the posts.  Screw down through the seat into the top of the two posts.  Use four screws in each post.


 Recycled sidewalk concrete was used to make the path and edging.


Now add your "brackets", stand back, and take a bow. 


 ***


If you enjoyed this post (and, gosh, I hope you did) please BECOME A FOLLOWER!

Friday, May 13, 2011

Vintage Style Hanging Light


I'm trudging along...working on my list of 10 projects.
This one is #8.  Feels like #800, but no, it's just #8. I'm counting.

 I plan to hang this baby in my TV room where it's needed for reading.  My floor lamp just bit the dust.  It started turning itself on.  Clearly that was not a good sign.  

So, this skeleton of a light (I had no idea what to do with it when I bought it) is now the perfect replacement.  It still needs to be rewired but for that,
I'll need a professional. 
I was inspired by the hanging light in this room, my favorite picture ever -- except for maybe my kids.


Now I have one of my very own.
***

I started with this pitiful excuse of a hanging light fixture.  I got it for a couple of dollars because it was missing a glass globe and was in need of rewiring.


I was busy looking for a replacement globe when I decided to try a cloth shade I already owned. 
I loved the look but it was stained...


Solution.  Strip it naked and give it a new outfit.  One that's a little more fun.


I used pre-washed burlap and the old shade cover for a pattern.  I hemmed the top and bottom and stitched jute along the edges to tie it on.  


The plate that held the original glass in place was oversized and perfect for keeping the wire shade snug and straight.  It will also help soften the light coming from the bottom of the shade -- great for a reading lamp!


I'm in love....


...with an inanimate object.  Again.

***

BTW, I'll be partying here...


If you enjoyed this post (and, gosh, I hope you did) please BECOME A FOLLOWER!

Thursday, April 28, 2011

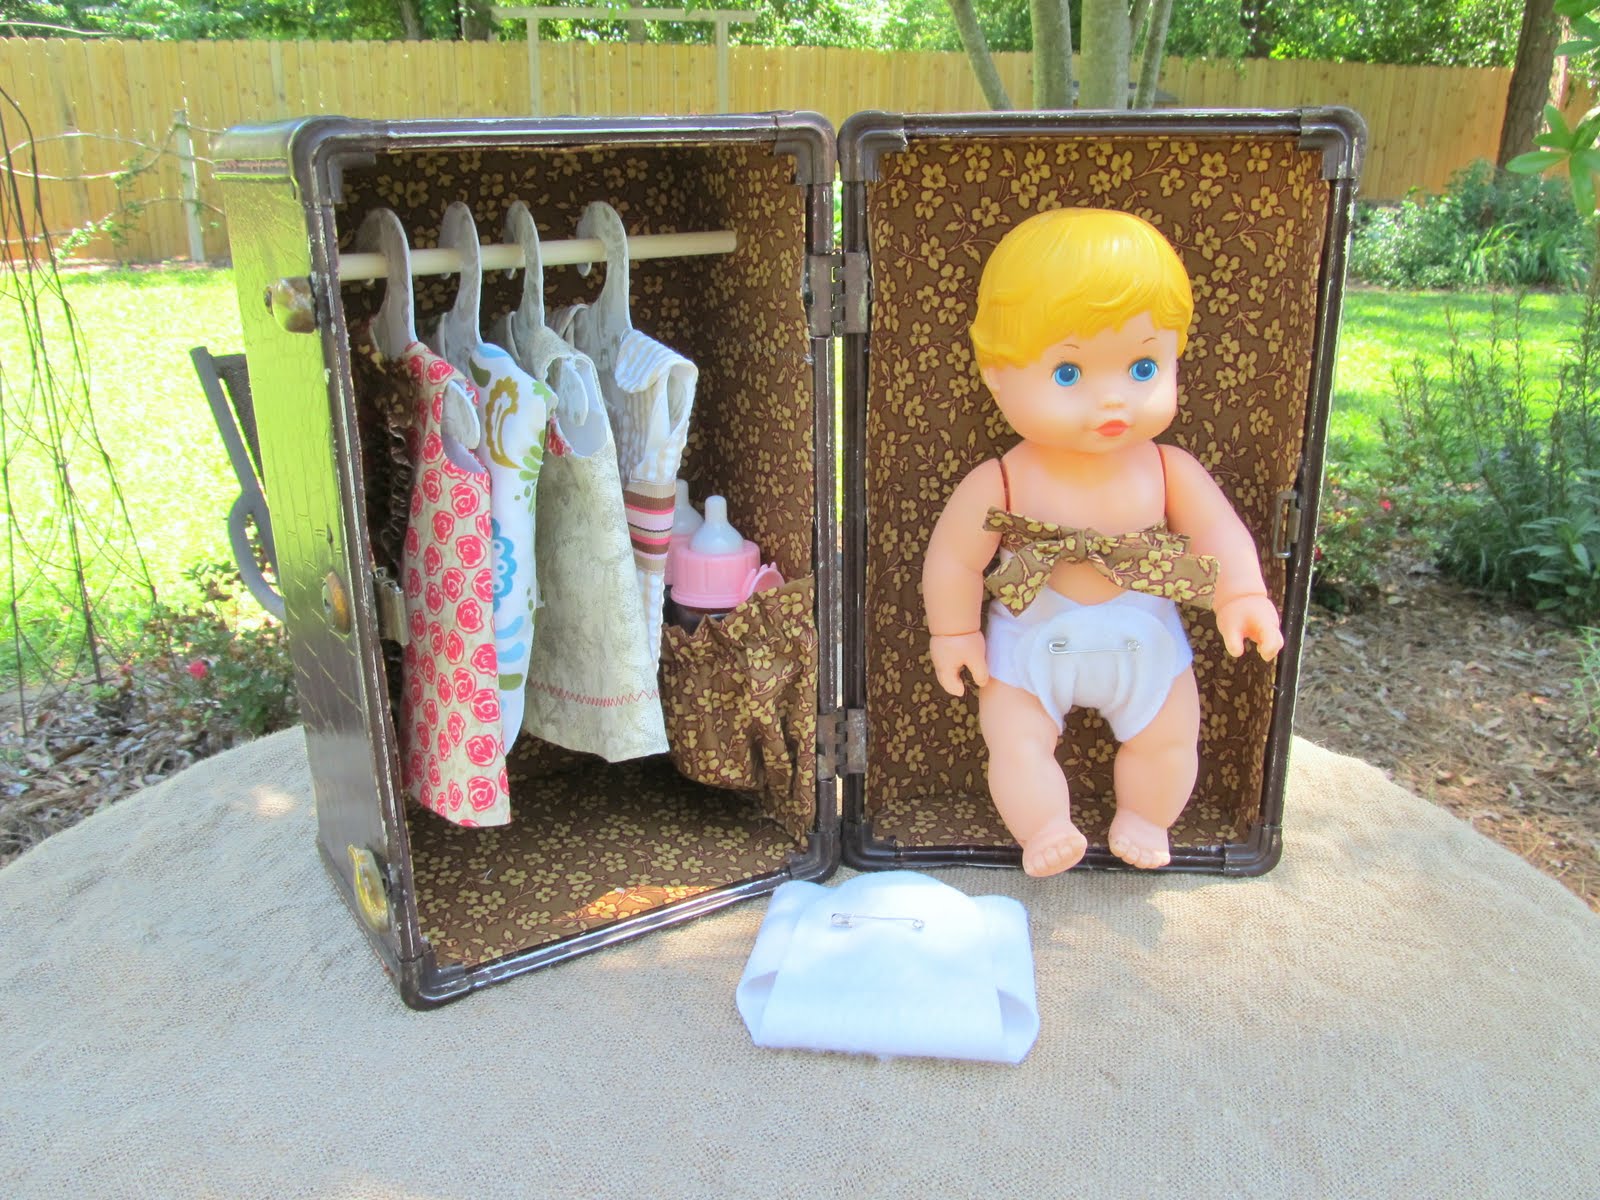
Vintage Overnight Case Turned Doll Trunk

My grandtwins, Aubrey and Chloe, have a birthday coming up.  Because I always make them something, I decided to use the overnight case (the third of my, maybe a little too ambitious, 10 projects in 3 weeks) to make them a trunk for a 1970's doll I found and for the doll clothes I made the poor little naked thing.


I'll have to find second suitcase.  I predict a cat-fight over this one.  I'll be ready with my video camera, though, just in case they stage a Youtube worthy brawl that'll make us all instant millionaires.  

Before they were infamous...


The doll and trunk were the perfect size for each other.  I love it when that happens.  A good bath was all the baby needed but the suitcase was a very different story.  


The outside of the case was in almost perfect condition and just needed a good cleaning and some furniture polish to liven it up.  It turned out awesome...


But, the inside was just plain nasty. I ripped the guts out  and re-lined it with a really cute vintage-y looking fabric.


This was a little tricky.  Not hard, really, just tedious.  Poster board was cut to fit then covered with the fabric using spray adhesive and white glue.  


The fabric was stitched to the poster board to help it stay put.


I added a little pocket for storage, the ties to hold the baby in place and a bar for hanging doll clothes. 


If you enjoyed this post (and, gosh, I hope you did) please BECOME A FOLLOWER!