Pages

Saturday, April 30, 2011

Guest Posting and Painting Giveaway!

You can catch me today at Gail's place--


  I'll be guest posting and giving away one of my paintings...

16"x20" Oil on Canvas


If you haven't already, check out Gail's blog.  This is one talented lady.  She has an amazing way with wood!  You'll find a couple of photo galleries that are 
cram-packed with great ideas.
  
And, while you're there...don't forget to enter the painting giveaway!!! 

Let's Party...


If you enjoyed this post (and, gosh, I hope you did) please BECOME A FOLLOWER!

Thursday, April 28, 2011

Vintage Overnight Case Turned Doll Trunk

My grandtwins, Aubrey and Chloe, have a birthday coming up.  Because I always make them something, I decided to use the overnight case (the third of my, maybe a little too ambitious, 10 projects in 3 weeks) to make them a trunk for a 1970's doll I found and for the doll clothes I made the poor little naked thing.


I'll have to find second suitcase.  I predict a cat-fight over this one.  I'll be ready with my video camera, though, just in case they stage a Youtube worthy brawl that'll make us all instant millionaires.  

Before they were infamous...


The doll and trunk were the perfect size for each other.  I love it when that happens.  A good bath was all the baby needed but the suitcase was a very different story.  


The outside of the case was in almost perfect condition and just needed a good cleaning and some furniture polish to liven it up.  It turned out awesome...


But, the inside was just plain nasty. I ripped the guts out  and re-lined it with a really cute vintage-y looking fabric.


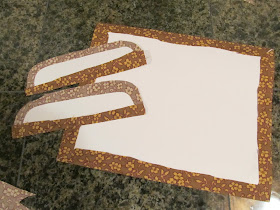
This was a little tricky.  Not hard, really, just tedious.  Poster board was cut to fit then covered with the fabric using spray adhesive and white glue.  


The fabric was stitched to the poster board to help it stay put.


I added a little pocket for storage, the ties to hold the baby in place and a bar for hanging doll clothes. 


If you enjoyed this post (and, gosh, I hope you did) please BECOME A FOLLOWER!

Monday, April 25, 2011

Vintage Suitcase Ideas

 The clock is ticking, I know, on my plan to finish my 10 projects in three weeks.  If I were the panic-y type I'd be there.  But, I'm not.  I'm more the rollin' with the punches type.  

So, when I realized I'd planned my 10 projects at the same time I was working on an out-of-town wedding for a friend, I just checked out for a week (which is more like a year in "blog" time) and planned on playing catch-up when I got home.  The story of my life...


Remember my pile?  I'm on the second of ten projects -- the vintage suitcase.  


By chance, my husbands initials are CW.


I paid the most for it, $10, and thought it was so perfect on the outside I didn't even open it to look at the inside! 


Bad move.  


(I photographed it here so as to soften the blow.)


I spent the morning surfing the web for inspiration...


...and found all these pictures on Pinterest. 
I have to admit I'm not 100% sure what Pinterest is except to say it's really very cool.


Very inspiring.  And what do I have in mind for mine?  You'll have to wait and see...

If you enjoyed this post (and, gosh, I hope you did) please BECOME A FOLLOWER!

Monday, April 18, 2011

10 Projects in 10 Days

Yeah right!  Sounds good but no way is it going to happen.  
You know it.  I know it.  The paint on the wall knows it...


But how about 10 projects in 21 days?  That sounds doable.  And just look at these great finds!  After an awesome bargain hunting Saturday I paid less than $20 for all of them! 

I'm giving myself just 3 weeks to finish all of these projects and post about them.  
Some are simple.  Others?  Not so much.

*

So who's going first?  The cute little McCoy planter raises its hand...


I love the shape of this planter with its curvy little handle.  The color is perfect, too.  I was over that chip on the front edge as 
soon as I saw the price --50 cents!

This was one of the easiest of the projects.  
All it needed was a plant and a photo op. 


I lined the inside of the planter with a heavy duty zip lock bag cut to fit, filled it with potting soil and tucked in some ivy I rooted in my kitchen window.


One down -- nine to go!


I AM INSPIRED.


If you enjoyed this post (and, gosh, I hope you did) please BECOME A FOLLOWER!

Saturday, April 16, 2011

Tomatoes 101

 I grew up in the south where my next door neighbor was an elderly lady named Mrs. Ardis.  She could grow just about anything and spent her days in her garden where I was always welcome.  I realize now I learned about sustainable gardening from her although it was not called that back then.

8x6 Oil on Masonite
I painted one of my seedlings a couple of years ago...
I must really like tomatoes!


Mrs. Ardis rooted roses, azaleas, and hydrangeas by the dozens.  She planted her cuttings in old coffee cans.  Each was covered with a bread bag making a mini hot house.  She grew her vegetables using seeds she saved from one year to the next.  Once, she pinned a leaf to her kitchen curtain that sprouted tiny little plants all along the edge.

I was fascinated.

I was remembering her and her Dixie Cups filled with tiny tomato plants yesterday when I was working in my vegetable garden.  I have wonderful memories of my sweet little Mrs. Ardis.

*** 

My first round of tomatoes were planted 5 weeks ago when they looked like this...


Now they look like this...


Planting Tomatoes

  • Plant a few hills early in the spring.  If we get a frost,  I just cover them up.  I just planted 3 more hills and will add another 3, a month from now.  I stagger my planting this way so that when one planting begins to play out, another one is just getting started -- I don't get all my tomatoes at once.  
 
  • I purchase plants (shame on me) from the garden center.  I like Celebrity and Sweet 100's and I look for plants that are not too leggy, stand upright, have no wilted leaves and no blooms.  

  • Grow two plants for each member of the family who will eat lots of tomatoes, as a rule of thumb. If you plan on canning tomatoes or making fresh and canned salsa, use up to four plants per person.

  • Plant in  a sunny spot.  Place tomato plants in a site that gets full sun (7 hours or more daily). Tomatoes need lots of warm sunshine.

  • Prepare the garden bed by adding lots of well rotted compost if you have it. 

  • Remove the leaves from the bottom half of the plant and plant deep in the hole burying 50-75% of the plant.  This is hard for me to do when I buy such a nice, tall plant but it's a must!  It makes for a stronger plant.

  • Give each plant about 1 gallon of warm water within ten minutes of transplanting to avoid transplant shock.

  •  Space tomato plants 18 to 36 inches apart.  Don't forget to leave yourself enough space to get in between the plants to water, weed, and harvest. Those cute, little seedlings may not remain that way for long. 

  • Use a tomato cage or a tall stake to support the tomato vine about 14 days after transplanting

  • Choose whether to use chemical fertilizers. I am lucky to have chickens and all the chicken poo I want.  I use soiled hay from my coop as a mulch for each plant being careful not to let the mulch actually touch the plant.  This is the only fertilizer I use because I have a chicken tractor that's been on all of my planting beds so the chickens have already fertilized each bed.  If you choose chemical fertilizers make sure they are made for vegetables and not grass and follow the manufacturers instructions!

  • Shake your plant poles or cages gently once or twice each week for about 5 seconds once flowering starts to promote pollination of the blossoms (from one flower to another).


  I'll have to post about chicken tractors soon but here is a look at mine in last year's garden...

Click on the picture if you'd like a little backyard tour with some pretty shocking "before" pictures!


Ha! Notice the tomatoes gone wild!

***

I'll be hooking with these fun ladies...


May 27 - Favorite appetizer recipe
A Little Knick Knack 


Fireflies & Jellybeans
Tales from Bloggeritaville
Brambleberry Cottage
My Repurposed Life
French Cupboard
Beyond the Picket Fence

If you enjoyed this post (and, gosh, I hope you did) please BECOME A FOLLOWER!